Tuesday, April 30, 2013

Moroccan Chicken Thighs


Once again I find myself thawing a pack of chicken thighs and needing something new to do with them, have you been there?  I am sure that you have.  I spend a good amount of time surfing Pinterest looking for recipes and today's post is the product from one of those searches.  I came across a kabob recipe on Womenist Women Interest, and decided a with a little modification I could apply it to my chicken thighs.

The marinade is super simple starting with nice fresh herbs.  Once you blend it up, the scent is awesome.  Since I was using thighs and not boneless breast chunks, plus it was raining so no grill, I utilized an oven roasting method that I use for another thigh recipe. The result was perfectly cooked chicken with wonderful Moroccan flavors.

Moroccan Chicken Thighs
Modified from Womenist Women Interest Grilled Moroccan Chicken

3/4 cup extra virgin olive oil
3 scallions, white with some green chopped
1/3 cup chopped parsley
1/3 cup chopped fresh cilantro
2 cloves garlic, pressed
2 teaspoons paprika
2 teaspoons ground cumin
1 teaspoon kosher salt
1/4 teaspoon turmeric
1/8 teaspoon cayenne pepper
¼ black pepper
6 chicken thighs

Put the marinade ingredients in a food processor and pulse until well mixed. If you don't have a food processor use a blender or mince the herbs and scallions until fine and then mix by hand.

Wash thighs and trim excess fat and skin.  Find a spot on the thigh and carefully run your finger under the skin to create a pocket.

Put about a tablespoon or two of the marinade in each pocket.  Then put the thighs in a zip lock bag and pour in the remaining marinade.

Refrigerate for at least a half an hour, but several hours is even better.

Preheat oven to 425 degrees. Arrange the chicken thighs in a roasting pan. Roast for 20 minutes, then reduce the heat to 400 degrees and cook another 25 minutes.

Monday, April 29, 2013

Vegetable Ravioli with Pink Sauce


As long as I can remember one of my absolute favorite foods has been ravioli. Wonderful little pasta pockets stuffed with filling and covered with sauce. It doesn't matter if they are filled with meat, cheese, lobster, veggies, it's all good.  As many things as I have cooked over the years I have never made ravioli, mostly because until a few months ago I had never made fresh pasta.  Once I got my Atlas Marcato, I knew it was only a matter of time.

The Atlas Marcato is not a fancy super automated pasta machine, it is a simple pasta roller that comes with a variety of attachments to cut the pasta into shapes.  The main purpose of the machine is to roll it out, which basically kneads the dough and delivers nice flat sheets.  You start on the widest setting and send the dough through a number of times until is has a nice silky texture.  Then you set the dial higher and higher to start thinning the sheets to the desired thickness. As far as the actual dough creation is concerned, I like to use my food processor to combine the ingredients.  It's fast and efficient.

Now really I thought my first experience with ravioli making would be cheese ravioli, but I've been on this veggie kick lately and thought it would be great to do a veggie filling. Something lighter with less calories. Plus I had the veggies in the refrigerator, if I wanted some ricotta I would have had to go to the grocery store.

If you don't  have a pasta roller you can still make this, you would just need to roll the dough out by hand. Yes, even I am rolling my eyes at that one.  Okay no pasta roller, you could use won ton wrappers and skip the dough making step, but of course you would be missing all the fun.

Vegetable Ravioli

Filling:
2 teaspoons olive oil
1/2 red bell pepper
1/2 small red onion, diced
1 portabello mushrooms, diced
1/2 large zucchini, diced
2 cloves garlic, pressed
2-3 handfuls spinach, chopped fine
2 tablespoons parmesan cheese, shredded
1/2 cup mozzarella, shredded
1/2 teaspoon kosher salt
1/4 teaspoon black pepper

Pasta:
1 1/2 cups flour
1 1/2 cups semolina flour
4 eggs
1 tablespoon Kosher salt
olive oil
water

Start with the filling, rub a little olive oil on the outside of the pepper and roast it in a 425 degree oven for 15 minutes. Chop fine.

In a saute pan heat the olive oil over medium high heat and cook onion until soft. Add the mushrooms and cook for about 4-5 minutes, add the bell pepper, zucchini, garlic and spinach and cook 4-5 minutes longer.  Remove from heat and let cool.  Add the parmesan, mozzarella, salt and pepper. Refrigerate until needed.

To make the pasta, put the two types of flour and the salt in the bowl of a food processor with the chopping blade. Mix, adding one egg at a time until all the eggs are incorporated.  Add about 1 teaspoon each of olive oil and water, continuing to mix until a dough ball forms, adding a bit more olive oil and water as necessary, the ball should be pliable but not wet. If the dough is too wet add a little flour.

Divide the ball into 4 smaller balls and cover with a damp paper towel to keep dough from drying out.  Working with one ball at a time and using a pasta roller such as the Atlas Marcato set on "0", send the dough through the machine a dozen or so times until the dough has a silky texture  Store the sheet on a piece of parchment paper while you work on the other balls.  Once you have turned the four balls into four thick sheets of pasta, let the sheets rest about 10 minutes, covered with parchment paper.

After the past has rested, cut each sheet in half and working one piece at a time send them through the pasta roller increasing the dial until it is set at "4". When you are finished you will have 8 sheets.  Keep the sheets covered when not working with them.  Take one sheet and spoon 8-10 centers of filling spaced evenly in two rows across the sheet. Lay another sheet on top and press lightly around each spot of filling to shape a mound.  Use a ravioli cutter or pizza cutter the cut the raviolis into squares.  Use a fork to press the edges of each ravioli closed. Make three more sheets of ravioli.  Set the raviolis uncovered on parchment paper to dry for about an hour, turn the raviolis over to let the other side dry.

Cook in boiling water for 7-8 minutes. Serve with desired sauce. I made a quick pink sauce using coconut milk, see the recipe below.

Pink Sauce

1 tablespoon olive oil
1/2 onion, diced
4 cloves garlic, pressed
1/4 red wine
28 ounces canned crushed tomatoes
1 teaspoon kosher slat
1/4 teaspoon black pepper
1/4 sugar
14 ounce can coconut milk

4-5 fresh basil leaves slivered


In a saute pan over medium high heat, saute the onion in oil until soft.  Add the garlic and saute 30 seconds or so more.  Add the red wine and cook 1 minute then add the tomatoes, salt, pepper and sugar.  Simmer on low for about 15 minutes, then add the coconut oil and basil.  Heat through.


Friday, April 26, 2013

Chicken Piccata over Rice


People seem to love the chicken recipes.  Of course I know why, we all need to keep adding new chicken recipes into the rotation to keep things fresh.  In today's post I am going to share a longtime favorite recipe, chicken piccata.  An old friend shared the basic recipe with me many, many years ago and I still make it often. It is very simple and what I love about it is the little bit of work there is to do is all done up front   So once you get it going, go grab a glass of wine and relax while it cooks.

Chicken Piccata over Rice

2-3 chicken breasts, sliced into to cutlets, or i package chicken tenderloins
1 egg
2-3 tablespoons milk
1 1/2 cups Italian bread crumbs
1 tablespoon butter
1 tablespoon olive oil
12 ounces chicken broth
juice of 1 lemon
1 cup rice

Get rice started, cooking it according to package instructions, then move to the chicken prep.  Beat milk and egg in a bowl large enough to dip the chicken pieces. Pour bread crumbs onto a large plate. Heat butter and olive oil in large skillet on medium high heat.  Working one piece at a time, rinse chicken and dip into the egg mixture, then coat with bread crumbs.  Lay each piece into the pan and move to the next until all pieces are coated and in the pan.  Brown the chicken on both sides, adjusting temperature as needed, then add the broth and lemon juice.  Turn heat to low, cover and simmer for 20 minutes.  Serve with rice.

Tuesday, April 23, 2013

Pantry Pasta


Meal planning is a great tool.  You set up the plan in advance so you know what you are having for dinner, you organize a good shopping list which in turn cuts down on impulse buying and wasted food.  I try to keep a meal plan going most weeks, but let's face it this is real life and sometimes things don't work out as planned or maybe there was no time to make a plan.  That's what this post is about, what to do for dinner when there is no plan.

This vegan dish is a good crowd pleaser and it is simple. What's more, I almost always have all the ingredients on hand.  So it's great for an impromptu pot luck, teacher's dinner or just OMG dinner time is here and I haven't got a planned meal.

Wait, did I say vegan?  It looks so creamy! Yes, the secret to this cream sauce is coconut milk.  This may seem odd to some but coconut milk makes a great pink sauce.  Don't let the fat scare you.  Coconut milk does a body good, check out the changing views on coconut milk and oil to see for yourself.

Pantry Pasta

2 T olive oil
1/2 onion, chopped
2 cloves garlic, pressed
1/4 cup red wine
2 cans diced tomatoes
1/4 t oregano
1/2 t basil
1/8 t crushed red pepper
1/4 t salt
1/8 t black pepper
1 can beans (Roman, kidney, butterbeans, whatever you have on hand), drained and rinsed
12-14 oz coconut milk
1 lb box of pasta

Saute the onion in olive oil until soft, add garlic and saute another minute.  Add red wine, stir then add tomatoes, and spices (the measurements are approximate, so season to taste).  Simmer for about 15-20 minutes.  Meanwhile, prepare the pasta.  Add the beans to the sauce and cook for about 5 minutes, then stir in the coconut oil.  Cook for another 5 minutes.  Mix sauce over pasta.

Monday, April 22, 2013

Shrimp and Veggie Stir Fry over Dressed Noodles


I love stir frying foods. It's a great way to cook a variety of ingredients together quickly, while being able to control the cook time of each item. By controlling the order of what goes in, you get your onions very soft but keep the broccoli nice and crisp.  I never make the same stir fry twice, but I do tend to use some staple items such as mushroom and onions.

The other thing about doing a stir fry is deciding what to serve it over.  I like brown rice, jasmine rice and farro, but one of my favorites is noodles.  With grains I keep the grains plain and rely on the stir fry for all the flavor. But when I do noodles, or more specifically linguine,  I like to dress the noodles first.  It's an extra layer of flavor and texture to make the dish a bit different.  Plus it guarantees that my picky eater will dig in.

As with all stir fries this dish cooks fast, so cook the noodles first and have all your other ingredients chopped and ready to go.

Shrimp and Veggie Stir Fry over Dressed Noodles

1 lb shrimp, shelled and deveined

Shrimp marinade:
2 cloves garlic, pressed
1 tablespoon brown sugar
juice of 1 lime
2 tablespoons fish sauce
3 tablespoons soy sauce
1/4 cup olive oil

1 lb linguine

Dressing:
1/4 t sesame oil
2 teaspoons rice wine vinegar
3 teaspoons soy sauce
1/4 cup olive oil

2 tablespoons coconut oil
1/2 large onion, sliced
8 ounces mushrooms, sliced
1/2 large red pepper, sliced
1 crown of broccoli, cut into florets
1 cup of snow peas

Combine the shrimp marinade ingredients and pour over the shrimp. refrigerate for at least an hour.

Cook the linguine according to the directions on the package. Mix the dressing ingredients in a small bowl. Toss the cooked pasta with the dressing.  Additional olive oil and soy sauce may be needed for moisture and flavor.


Meanwhile heat the coconut oil in a wok, add onions and cook for 2-3 minutes.  Add the shrimp, reserving the marinade. Cook for about 30 seconds and then add the mushrooms.  After 1-2 minutes, pour in the reserved marinade and add the red peppers. Stir-fry for a minute then add remaining veggies and stir fry a few minutes longer.  Remove from heat, then toss with dressed noodles.

Tuesday, April 16, 2013

Naan Veggie Pizzas


This is going to be nice quick post, because these pizzas make a great quick dinner.  Naan, which can be found in the bakery section of your grocery store, makes a great crust for little gourmet style pizzas.  There is a trick getting the naan nice and crispy and keeping it that way.  I like to put the crusts in the oven with a bit of olive brushed on top for a few minutes prior to adding the toppings.  I also like to give the veggies a quick saute, so that the cooking time of the completed pizzas concentrates on melting the cheese and crisping the edges of the crusts and keeps the pizzas from getting soggy.

The beauty of this meal is that it is usually thrown together with items that I need to use up.  You would never know it. Except for the fresh mozzarella, these particular pizzas are made from veggies lingering in my veggie bin and other leftovers in my refrigerator. The naan was in my freezer just waiting for a chance to be used. Be creative!

Naan Veggie Pizzas

Naan
Swiss Chard Pesto
leftover pasta or pizza sauce
fresh ricotta
fresh mozzarella
portebello mushrooms, sliced
onions, thinly sliced
green peppers, thinly sliced
Italian eggplant thinly sliced
olive oil

Preheat oven to 425.  In a saute pan over medium high heat, saute the mushrooms, onions and peppers in a bit of olive oil for a few minutes just to soften a bit. Brush the tops of each piece of naan with olive oil and bake for about 5 minutes. Spread some pesto on a few and pizza sauce on others. Then add the cheese to each one.  Top with remaining toppings and bake until cheese is melted and sides are crusty.


Friday, April 12, 2013

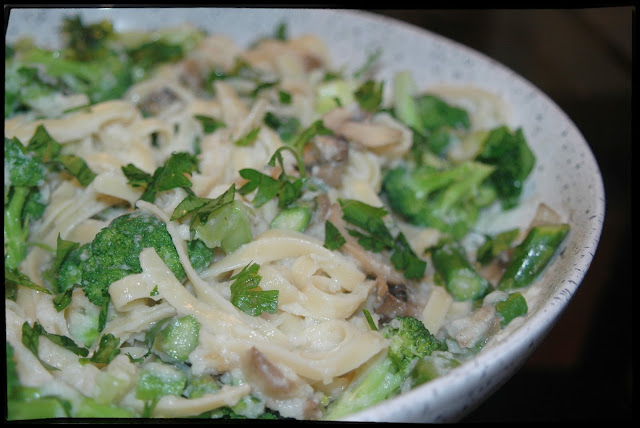
Creamy Cauliflower Alfredo Pasta


I feel like am starting to blossom as a vegetarian cook. Yes, we still eat meat, but less and less.  I am learning how to think outside of my box and to use plant based foods in new ways.  Now it's not that I am overflowing with these ideas on my own, I get sparks from the ideas of others and then build on them.  Today's dish is one of those take a good idea and build on it recipes.

There is a great site called FatFree Vegan Kitchen.  I'm not really into the whole fat free veganism thing, but she's got some great ideas that I can build on.  The other day a post came out for Fettuccine No-Fredo with Broccoli and Sautéed Mushrooms, and it looked quite tasty.  Now using cauliflower to make a lighter, healthier creamy sauce is not a new idea, but it is something I have never tried. Knowing that I like a little fat in my cream sauce, I knew I wanted to modify it a bit. After viewing this recipe, I surfed around a bit to see what others were doing.  Many non-vegans were adding in some heavy cream.  That did not appeal to me, plus I was already starting the first steps of making dinner.  What did I have on hand?  Plain Greek yogurt, that was the ticket.

My version came out nice and creamy, with lots of veggies to help even out the ratio of veggies to pasta.  What did my picky eater think?  She loved it, except for the mushrooms, but that was to be expected.  This will definitely go into the rotation.

Creamy Cauliflower Alfredo Pasta


1 large head cauliflower, cut into pieces 
4 cloves garlic, minced 
2 cups water 
1/2 teaspoon oregano 
1/2 white pepper 

1lb fettuccine

3/4 cup plain Greek yogurt
salt
pepper

2 tablespoons olive oil 
1/8 cup red onion, diced
8 oz mushroom, sliced
small bunch asparagus, cut into 1 inch pieces
2 small broccoli crowns cut into florets 
kosher salt
black pepper 
2 teaspoons fresh parsley roughly chopped

Put the cauliflower and the next 4 ingredients into a pot and bring to a boil, reduce heat to low and cover.  Cook for about 15 minutes or until tender.  Pour contents of the pot into a large food processor.  If you don't have a food processor, use a blender. Don't blend yet, just let it cool a bit.

Meanwhile, cook the pasta according to the instructions on the package. Reserve a bit of the water in case you need it for the sauce.

In a wok or other large pan, heat the olive oil and saute the onions until soft.  Add the mushrooms and toss to coat with the oil.  Cook for about 3-4 minutes, stirring.  Add the asparagus and broccoli and stir fry another 3-4 minutes.  Remove from heat and season with salt and pepper.

Now that the cauliflower has cooled a bit, blend it until smooth.  Add a bit of the cauliflower puree into the yogurt and mix to temper it before adding it to the food processor.  Blend in the yogurt and salt and pepper to taste.

Put the pasta into a large bowl and toss with the cauliflower sauce.  If it is too thick, you can add a bit of the pasta water.  Once mixed, gently toss in the sauteed veggies and garnish with parsley.


Wednesday, April 10, 2013

Veggie Stir Fry Over Italian Grains


Okay the weather has gotten warm and I have fallen off my blog posting schedule. Stuff happens. I am back on the wagon, in more ways than one. Today's dish is what I think of as a meat detox dish.  The previous few days our family lived on southern baked ham and macaroni and cheese. Tasty stuff, but really not healthy.  That's fine I had the ham in the freezer and it needed to be used, so now it has and it is gone. Time to move on.

After all that heavy food I needed something light, but still hearty enough for dinner.  That's where this dish comes in.  It's full of veggies, plus it gets a protein punch from the 5 grains in the Italian grain mix I like to use. It's by Pedon and contains farro (spelt), barley, durum wheat, rice, and whole grain oats. I found it at Costco.  If you can't find it in your local store, you can always use straight farro or brown rice.

This a lovely dish on it's own, but the next day I heated up the leftovers and added a few spoons of Swiss Chard Pesto (just because it was still in the fridge and needing to be used), and it was a winning combination!

Veggie Stir Fry Over Italian Grains

1 cup Pedon Italian 5 grain mix
2-3 tablespoons olive oil
1/2 yellow onion, sliced thin 
1 portabello mushroom, sliced and cut into large pieces
1/2 Italian eggplant, halved then thinly sliced  
1 jalapeno pepper, sliced 
1 zucchini, halved then sliced 
1 small crown of broccoli cut into florets and thinly sliced stems
4 cloves garlic, pressed 
10 or so cherry tomatoes, halved 
1 cup Pedon Italian 5 grain mix  
salt and pepper to taste
several fresh basil leaves, cut into slivers
1 tablespoons balsamic vinegar
2 tablespoons olive oil

In a medium saucepan, heat 2 cups of water to boiling, add the grains and cook following the package directions.  Although I find with this grain , I need to cook it a bit longer than the package says.

In a wok heat the olive oil over medium high heat and add the onions, stir fry to soften.  Then add the mushrooms and eggplant, stirring quickly to get all pieces covered with oil before it gets soaked in.  Stir fry for 2-3 minutes until eggplant softens. Next add the jalapeno pepper and zucchini, stir fry another minute or so then add the garlic and broccoli   After about 2-3 minutes add the tomatoes, cook a minute longer then remove from heat.  Mix the balsamic vinegar and olive oil and pour it over the veggies Add the basil and then salt and pepper to taste.  Toss and serve over the grain mix.

Friday, April 5, 2013

Linguine with Swiss Chard Pesto and Ricotta


Ever since I stumbled across The Kitchn's Winter Greens Pesto recipe, I have been in love. With winter greens that is. I can't enough of this stuff. I mean what is there not to like, wonderful healthy greens, walnuts, cheese, garlic and olive oil?  Put it over some pasta and I could live on it forever.  How it could it get any better?  Well, I just figured that out today.

First let me tell you about my other new favorite, ricotta cheese.  Not your grocery store variety but gourmet fresh ricotta, or even better homemade ricotta. I got turned on to homemade ricotta last week in Philadelphia.  There is a British Style pub there called The Dandelion.  If you are in Philly, go.  While you are there order the homemade ricotta with sour bread, you wont be sorry.  I know sometime soon I will have to make my own.  Until then I found something not quite as good, but way better than the regular grocery store variety. It's fresh Piacci Ricotta and I don't think I can ever go back to the old stuff.

As lunch time came around today I was torn.  I had both the pesto and ricotta in my refrigerator begging to be used.  There was only one thing to do, cook up some linguine and combine them.  There you go, two new favorites mixed together and served over an old favorite.

Linguine with Swiss Chard Pesto and Ricotta
adapted from The Kitchn's Winter Greens Pesto 

1/2 cup chopped walnuts, toasted
1 bunch Swiss chard, trimmed, rinsed and chopped
3/4 cup shredded Parmesan cheese
1/2 cup extra-virgin olive oil
4 cloves garlic, chopped
Juice from one lemon
1 teaspoon kosher salt
1/2 teaspoon pepper
¾ - 1 cup fresh ricotta cheese
1 lb linguini

Toast the walnuts on a baking sheet in a 350 degree oven for 6 minutes.

Quickly blanch the Swiss chard in boiling water removing as soon as it begins to go limp. Immediately plunge it into cold water to stop the cooking process. Drain the Swiss chard and dry it on towels or in a salad spinner. Then place it in a food processor.

Add the nuts, Parmesan, olive oil, garlic, lemon juice, salt and pepper and pulse until smooth. Add more olive oil if needed.

Cook the linguine and drain it.  Mix in the desired amount of pesto and then the ricotta cheese.  Serve immediately.


Thursday, April 4, 2013

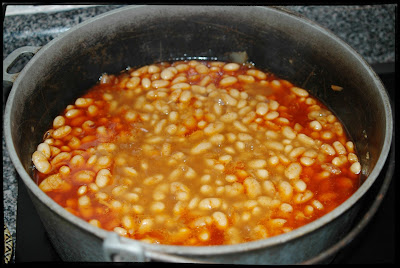
Mexican-Style Great Northern Beans

What is this obsession I have with forgoing the simplicity of canned beans for the long version using dried beans? It's simple, the layering of flavors that happens when you start with dried beans.  Yes, canned beans canned be flavored and spiced up, but inside the bean, it's still plain. The only way to get that complex, slow-cooked flavor is to put it there beginning with the dried bean.

The recipe that fueled this latest obsession is the one I am posting here today. I have been making these beans for years.  Well sort of, when I first started making them many, many years ago, I always took them one step further to make re-fried beans.  Somewhere along the way I stopped making re-fried beans and this recipe was forgotten, as was cooking with dried beans.

I brought it back to life about a year ago.  A friend was having a taco party and I offered to bring beans.  Since it was the only thing I was making, I felt that canned beans were a cop out. That's when I remembered this recipe, the only problem was it had been Years since I made it and I had to remember where the recipe was.  I don't know about you but I have tons of cookbooks, recipe cards in different shapes and sizes, and even worse hundreds of print outs and ripped out magazine pages, etc.  What format was this recipe in?  After a while I found it in an unlikely place, this 30 year old Betty Crocker Mexican cookbook. I mean really, a fab Mexican bean recipe from Betty Crocker?  Whatever, it's a good recipe and even though I don't think I ever made anything else from this book, I may have to give it another look.

As usual this recipe has evolved to fit my tastes and cooking style. I included a pic of my stained and marked up version below, plus if you want re-fried beans my old recipe is there too.  Although the recipe calls for pinto or black beans, I have always used great northern.  Don't let the dried beans hinder you, the hands on time of this dish is less than 10 minutes. Okay, you'll see that Betty says you can substitute canned beans, but it won't be as good.

By the way, these freeze nicely so make a big batch and freeze half.

Mexican-Style Great Northern Beans
Adapted from Pinto Beans, published in Betty Crocker's Mexican Cookbook, 1981

6 cups water
1 lb dried great northern beans
1/2 cup chopped onion
1/4 olive oil
3 cloves garlic
1 1/2 tablespoons chili powder
small splash of liquid smoke (or 1 slice bacon)
1 teaspoon salt
1/2 teaspoon cumin
chopped cilantro

Rinse and sort beans to remove any rocks or deformed beans.  In a dutch oven, mix the beans, onion and 6 cups water.  Cover and bring to a boil, boil for 2 minutes then remove from heat.  let stand at least 1 hour.

Drain the water from the beans.  Add the remaining ingredients and enough water to cover teh beans plus about 1/2 inch.  heat to boiling and then cover and simmer for about 2 hours or until the beans are very tender. Add water during cooking time if needed. Garnish with cilantro.

The original marked up version from my cookbook


Tuesday, April 2, 2013

Very Veggie Lasagna


Some of you may have seen this recipe before. That's because I originally posted a version of this recipe last year on my old blog.  This is a lighter lasagna, chock full of veggies, that has become a family favorite.  It's different each time I make it, since it can be made with whatever veggies are in season, are in the refrigerator, or whatever you want. Anyway since I am trying to get all my recipes in one place, it needs a new home here on Witchery in the Kitchen.

I love lasagna, but the reality is that it is filled with low value carbs and fat.  I've been cutting the fat content for years using part skim dairy products, but I wanted to up the nutritional value of this favorite to make it a guilt free option on our menu.  So I decided an increase in veggie count would be the way to go.

I started by breaking down the elements of my regular lasagna, first on the list was the sauce.  I usually use some sort of meat in my sauce, so to cut calories and fat I decided to go with a straight tomato sauce.  This does not need to be boring, there is something really fabulous about a sauce of tomatoes, garlic and fresh basil.  These ingredients served as the base.

The next element is the cheese. Usually I go with a mix of ricotta, mozzarella, parmesan and egg. I also saw some room to cut calories here.  I like the cheese, but I wanted a lighter feel to the lasagna and envisioned a thin creamy layer instead of a thicker heavy layer. To accomplish this, I cut the amount of ricotta in half, skipped the egg and added milk to make it more of a sauce, allowing a little to go a long way.

The last item, and star of this lasagna was the addition of lots of veggies.  I used a mandolin to make the most delicate paper thin slices.  I knew that these slices would not only add great flavor and bulk, but that they could also replace some of the noodles. In fact, my daughter thought they were noodles and actually ate them! SCORE!
  .
Very Veggie Lasagna

Sauce:
6 cloves garlic crushed
2 T olive oil
Several fresh basil leaves thinly sliced
2 -28 cans crushed tomatoes
¼ cup red wine
salt and pepper
2 T. Honey

12 lasagna noodles
salt

Cheese:
15 oz small part skim ricotta
½ cup 2% milk
½ cup grated parmesan cheese
2 oz shredded fresh mozzarella

Veggies:
1 large yellow squash
2 small to medium zucchini
10 ounces portabella & white mushrooms, thinly sliced

 6 oz shredded fresh mozzarella

Preheat oven to 350 degrees and prepare large pan with Pam spray.  

Start with the red sauce.  Heat oil in sauté pan over medium heat and add garlic, stir for a minute or two.  Add the remaining sauce ingredients and allow it to simmer while preparing the ingredients for the other layers.

Cook pasta in salted water according to the directions on the package. Drain and set aside in cool water until needed.

In medium bowl, mix the cheese sauce ingredients.

Prepare the veggies by slicing the squash super thin using a mandolin slicer.  Then slice the mushrooms by hand.

Assemble lasagna:  pour about 1 cup of sauce in the bottom the pan.  Then line the bottom with 4 noodles.  Top with the eggplants slices, then half of the cheese sauce. Add a thin layer of the red sauce then layer on all the zucchini   Add another thin layer of the red sauce and a layer of 4 noodles.  Next put the layer of mushrooms and then the other half of the cheese sauce.  Top with the zucchini, the last 4 noodles and a layer of red sauce. 

Cover with foil and bake for 1 to 1 ¼ hours or until bubbly.  The pan I use is a huge polish stoneware pan and it takes longer to bake in this pan than others, so start checking at 45 minutes if using a glass or aluminum pan.  Once the lasagna is nice and bubbly remove foil and sprinkle 6 oz of mozzarella on top.  Return to the oven for a few minutes for the cheese to melt.  Allow the lasagna to set for at least 25 minutes before slicing.